It has been a few years since I last reported on my homelab, and a lot has changed. Most of the changes before 2025 were tweaks and small updates. The biggest changes actually came around 2025 when I decided to overhaul my home network due to 2 main issues with my previous setup:
- My network was unstable, and I got networking problems every few months.
- I need a better local AI solution for inference and fine-tuning.
Without further ado, let’s dive into the changes I made for each.
Networking
I’ve been using an old PC turned pfSense router with a mishmash of routers and access points. Here’s the setup:
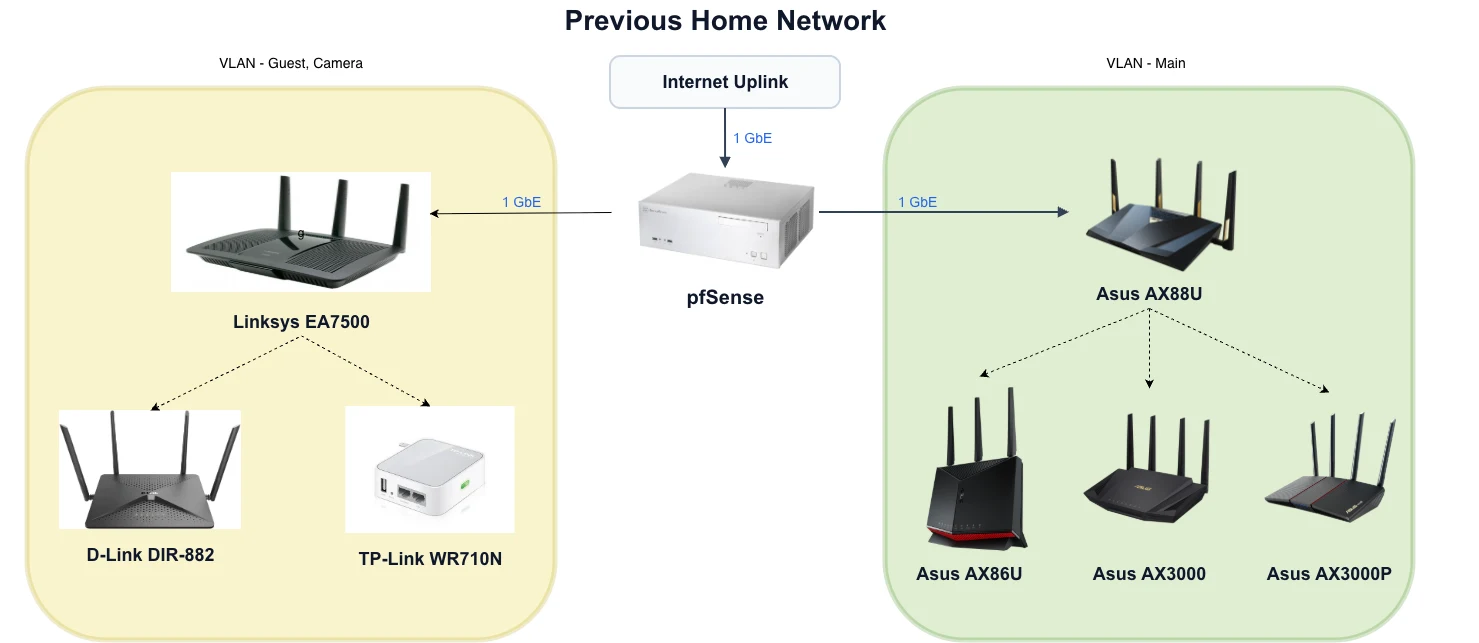
- pfSense (main firewall and router) running on an old PC
- Main VLAN and Wi-Fi running on Asus routers
- Guest and IoT VLAN running on OpenWRT routers (D-Link + Linksys) connected via WDS and another TP-Link router
The first time I used pfSense was back in 2022. I chose pfSense because it was one of the few routers for home/SOHO users that supported all the features I was looking for. These include:
- Supporting multiple VLANs with different internet and LAN access patterns.
- Route the internet access through a WireGuard VPN client (e.g. ProtonVPN).
- Tailscale subnet router and client.
- DNS sinkhole ad blocking (pfSense has its own version of Pi-Hole).
After installing pfSense, I added a 4-port NIC, configured VLANs on the ports, and connected them to routers and access points according to their assigned VLANs.
The routers’ original firmware didn’t support VLANs, so I had to use 2 sets of routers with custom firmware installed. That meant Asus routers running Asuswrt-Merlin for the main VLAN, and OpenWRT routers for the Guest and IoT VLANs.
OpenWRT offers various ways to wirelessly connect access points. I picked WDS because it was the most suitable method for my access points and setup.
The setup was tedious. While there are docs and instructions online, it is hard to find information for the specific situation I was in. Quite often, I would be stuck with a problem that required going through a bunch of network debugging steps to find where it lay.
After the initial setup, the network would malfunction every 2-4 months. And if it was stable for more than 4 months, I would add new features. Unfortunately, this could destabilize the network again. I know I didn’t want to be stuck in this and needed a change.
I finally found my catalyst!
10Gbps FTTH Internet
The broadband in my home was 1 Gbps. This was the standard speed back in 2022. But in the last year, 10 Gbps home internet has become prevalent in my area. I was counting the days until my old contract expired so I could renew with a faster connection. The crazy part is that the new fibre connection is only US$23 a month, which is less than what I was paying for the 1 Gbps! It’s amazing how, with government initiatives, ISPs have managed to lower prices while increasing speeds.
The current pfSense box is installed with a 4-port NIC with 1 GbE connections. A 4-port 10 GbE NIC is expensive. And I couldn’t stick that in my current pfSense box as the motherboard is too old to support it. It also doesn’t make sense to use a wireless backhaul anymore, as that would be just doing a disservice to the 10 Gbps internet. So I would need to lay new network cables around the home.
With a 10 Gbps internet connection, it also makes sense to upgrade the wireless access from Wi-Fi 6 to Wi-Fi 7.
As it turns out, I needed to upgrade my whole networking stack.
Out with the Old, In with the New
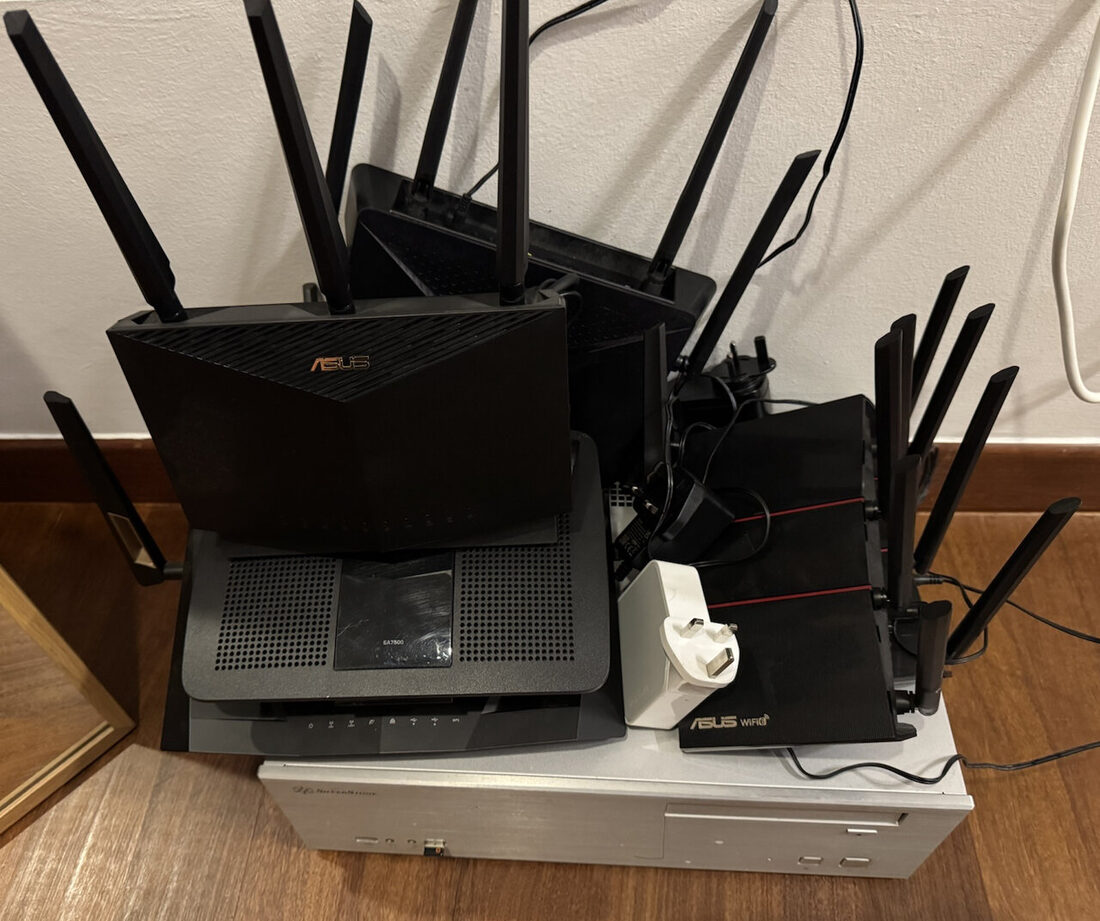
The old network stack: pfSense plus a mix of routers from different brands.
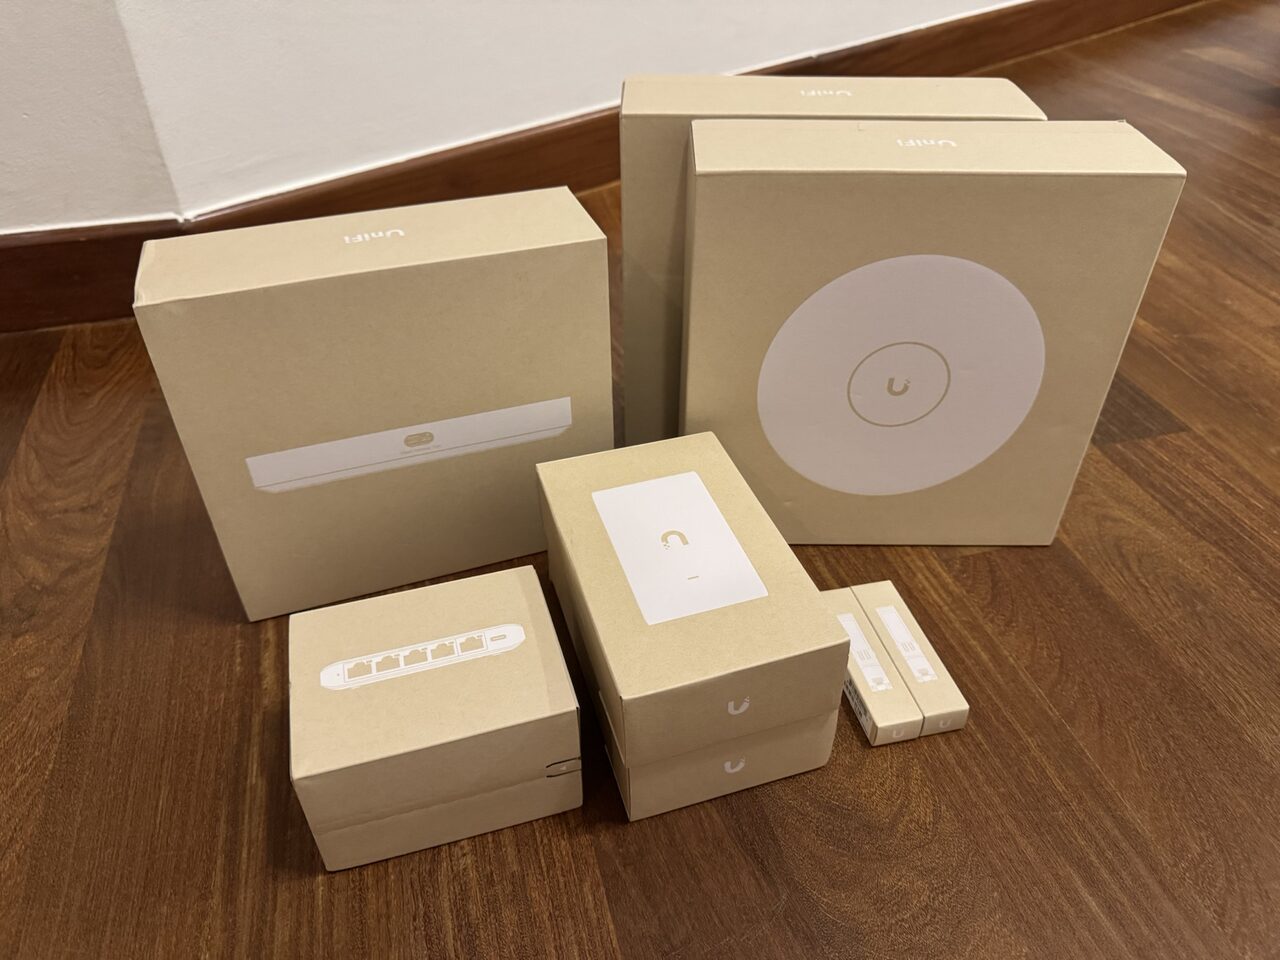
The replacement UniFi stack, built around Cloud Gateway Fiber and Wi-Fi 7 access points.
I’ve had my eyes on Ubiquiti products for years. One of their main product lines is targeted at prosumers. Their unique approach of separating the wireless abilities from routers leads to a much cleaner upgrade path. Among the consumer and prosumer systems I had looked at, their centralized network configuration felt the most complete. I didn’t pick them before because they didn’t have support for WireGuard VPN clients. But in recent times, they have added it.
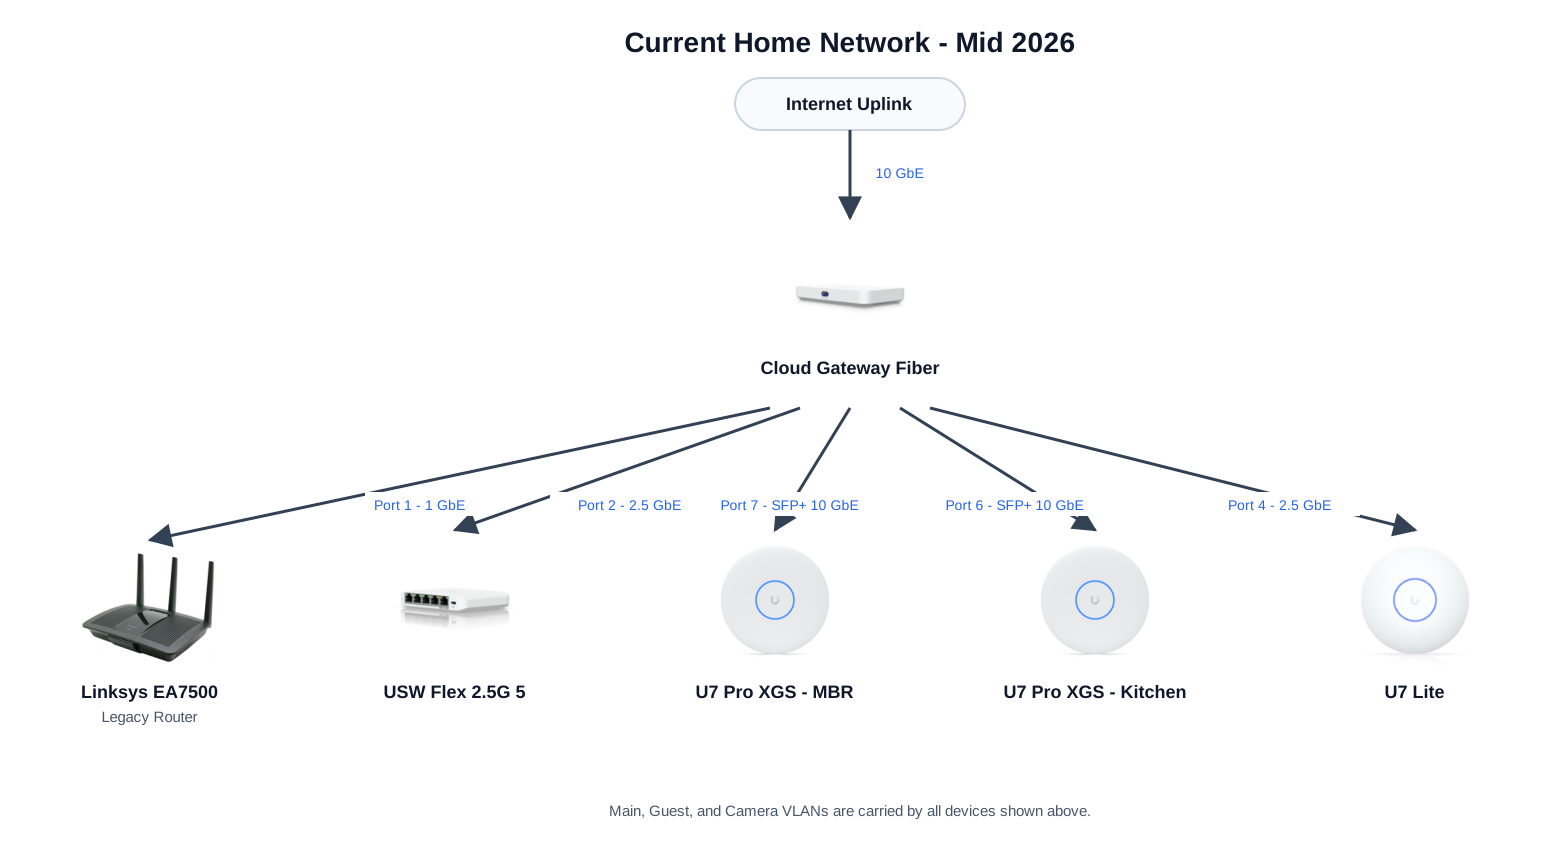
One of their most interesting recent products is the Cloud Gateway Fiber. It offers two 10G SFP+ ports and a 10 GbE RJ45 port. This is perfect for me to connect one end to the internet, and the other two to their Wi-Fi 7 access points (U7 Pro XGS). The other pieces of equipment I got were:
- U7 Lite: for a small part of my home where the other 2 access points couldn’t reach.
- USW Flex 2.5G 5: for wired connections in my home office, which includes connecting to my new desktop (discussed below).
- Linksys EA7500: Reusing an old router that acts as a switch for connecting my existing laptop servers that only have 1 Gbps connections.
It Just Works
Now that the network has been up for about 6 months, I’ve had 0 problems:
- No random network downtime.
- My WireGuard VPN client stays connected without hiccups.
- Version upgrades are seamless and don’t require my attention.
I can certainly see similarities between Ubiquiti products and Apple products (not a surprise, given that Ubiquiti’s founder worked at Apple before founding Ubiquiti). Despite forcing you into its ecosystem (e.g., managed/unmanaged switches from other brands don’t show up properly in the network map, even though they function perfectly), it just works.
Coming from an “open networking architecture” of pfSense and OpenWRT, a homogeneous networking stack that feels a bit “locked-in” does have its advantages. For one, their centralized control UI is beautiful and intuitive. I can change everything about my network through 1 interface.
Besides the stability, speed was obviously an improvement. I installed Cat6a cables throughout my home, so having a wired backbone is a huge leap over the earlier wireless backhaul setup. Using Cloud Gateway Fiber’s built-in internet speed test, I consistently saw 7-8 Gbps. That seems decent once protocol overhead and real-world ISP conditions are included. Since all the wireless access points were tri-band Wi-Fi 7, my Wi-Fi 6E clients could still exceed 1 Gbps in practice. Speed improvement is most noticeable when I have multiple clients downloading simultaneously, all transacting at top speed.
Is Ubiquiti all sunshine and rainbows?
Ubiquiti products aren’t perfect, and a quick online search will show you that.
One of their biggest disadvantages is that if you have a must-have feature that isn’t supported by them, then don’t bother looking for custom firmware or hacks. Just move on to another brand. Ubiquiti makes it difficult for anyone to add their own features by blocking custom firmware (another Apple-esque behaviour?).
With other brands, this is relatively easy. For example, I installed OpenWRT on my Linksys and D-Link routers to add features the manufacturers refuse to add. These end-of-life routers also enjoy an extended shelf life because they now receive security patches. For my Asus routers, there is even a “semi-unofficial” firmware called Asuswrt-Merlin, with which the author works closely with Asus on development.
Local AI
For local LLM inference and AI projects, I have been using my laptop, a MacBook with the M4 Pro and 48 GB of RAM. The workloads I care about are local LLM inference, image generation, fine-tuning experiments, and CUDA-accelerated ZK projects. There are a few issues with this setup:
- Lack of CUDA support is the biggest downside. Many local AI projects are more difficult to run because the ecosystem support for Apple silicon is lacking. In addition, inference beyond LLMs, such as image generation, is painfully slow, making it impractical.
- LLM inference performance is mediocre. This should get better as Apple improves the MLX stack. But I’m not sure it’ll ever be at CUDA levels.
- I find 48 GB of RAM somewhat sufficient, especially when running sparse models. But I still wanted more VRAM.
To dGPU or Not to dGPU? That Is the Question.
Dedicated GPUs used to be the only viable option for accelerating AI applications. But over the last year, several viable alternatives have emerged. The main factors I considered were:
- CUDA compatibility
- VRAM capacity
- local inference performance
- availability
- daily-driver suitability
- price
| Option | Upside | Downside |
|---|---|---|
| Strix Halo | - 128 GB RAM with 96 GB as dedicated VRAM - Functions as a regular PC when not using it for AI - Framework Desktop looks fun! | - ROCm vs CUDA gap still wide - Slower than dGPUs |
| NVIDIA GB10 | - 128 GB of memory - Nvidia’s designated deployment testing platform with access to Nvidia’s enterprise software stack | - Limited availability - Mediocre performance; on par with RTX 5070 - ARM apps compatibility is questionable for a daily driver |
| Mac Studio* | - 128 GB or more of memory - Quiet and efficient | - MLX remains behind CUDA in ecosystem and performance |
| RTX Pro 6000 Blackwell | - 96 GB VRAM - Best local-AI performance | - ~US$20,000 - Long wait - Still need budget for the PC |
| RTX 5090 | - Strong performance for inference and fine-tuning - PC as a daily driver - Readily available | - 32 GB VRAM - 50% over MSRP |
* Apple has stopped selling the 128 GB, 256 GB, and 512 GB Mac Studios.
For the kinds of quantized local models I expect to run, cards like the RTX 5090 and RTX Pro 6000 can reach the low hundreds of tokens/sec in favorable setups. That is fast enough for the interaction to feel responsive, which is what matters most for my local workflows.
A general drawback of the non-dGPU options is that, while they can run large LLM models, their performance leaves much to be desired. Their inference performance ranges from 20 tokens/sec to 80 tokens/sec, with average-at-best TTFT (time to first token), depending on the model architecture, number of parameters, etc. While it’s unrealistic to expect a local model to match the speed of a subscription model, I think it needs to support at least 100 tokens/sec to be usable without sacrificing too much of the user experience.
In the end, I decided on the RTX 5090. While it has small amounts of VRAM, I figured that as models get better, the performance of smaller models will be good enough for most daily tasks. I would have preferred more VRAM, but CUDA compatibility, availability, and using the same machine as a daily desktop mattered more than chasing the largest possible local model. Besides, I won’t be canceling my LLM subscriptions anytime soon, so I will always have that for more complicated tasks. While its price is horrible from a historical perspective, it was actually not as bad as in other areas. And most of all, given that we are in a multi-year GPU/memory/storage/compute crisis, it helps put the price premiums into perspective.
How I Miss Building a Desktop!
I was a lifelong Windows laptop and desktop user. Only in 2020, when I finally decided to upgrade my 4-year-old Surface Pro 5, did I decide on the Apple MacBook Pro M1 Pro. Its insane battery life and performance (by 2020’s standards and even today’s) blew everything else out of the park.
My old desktop became a big dust collector. It was loud and underpowered. Aside from toy experiments, I struggled to find a reason to use it when my M1 was better in every way.
With the RTX 5090 decided, now I needed to build a new desktop. Here’s what I got:
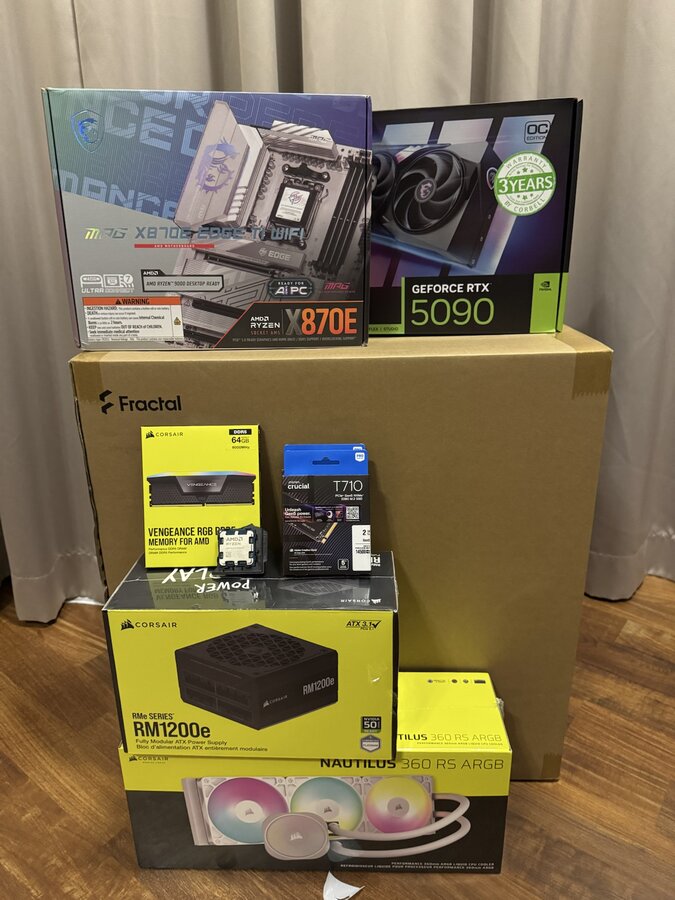
| Part | Name |
|---|---|
| CPU | AMD Ryzen 9 9950X3D |
| GPU | MSI RTX 5090 |
| RAM | 2 x Corsair 32 GB DDR5 |
| MB | MSI X870E |
| SSD | 2 x Crucial 2 TB PCIe 5.0 |
| PSU | Corsair 1200 W |
| AIO | Corsair Nautilus 360 |
| Case | Fractal North XL |
Once all the parts arrived, I simply stared and smiled at them like a kid again. The last time I built a PC was well over a decade ago. I’ve been keeping up on PC hardware news, so I was already familiar with the latest PC parts, standards and trends.
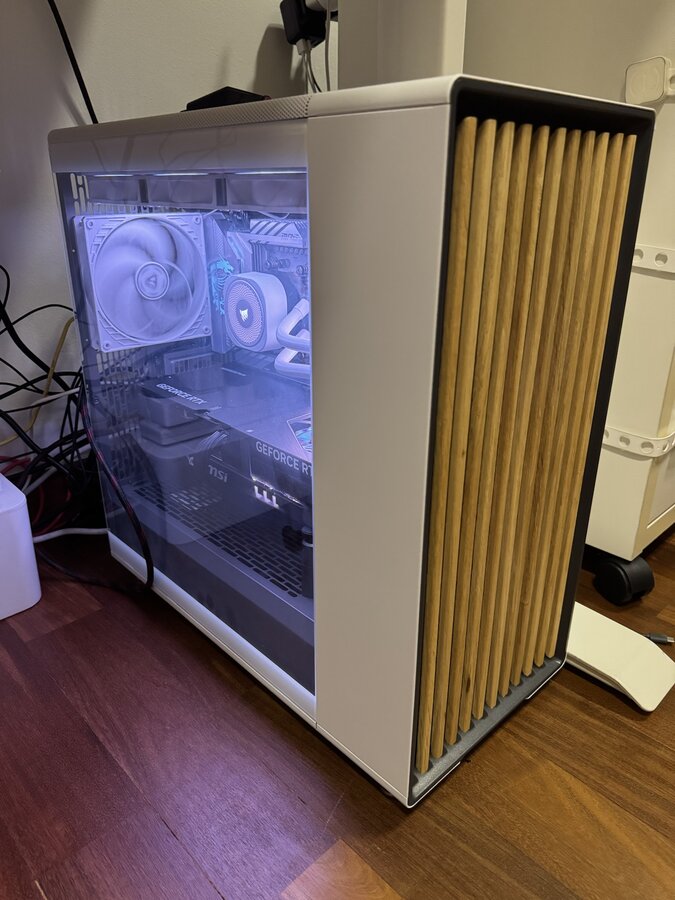
Now that I finally have access to a powerful GPU, I’ve noticed I tend to do more small experimental projects (usually AI or other CUDA-accelerated ZK projects) that involve GPUs.
PC Parts Are Appreciating Assets!
As of mid-2026, roughly 6 months after purchase:
- The RTX 5090 had a months-long queue locally and was selling for at least 2-2.5x over MSRP.
- 2 TB PCIe 5.0 SSDs were selling for roughly 2-2.5x what I paid before the price hike.
- The 2 x 32 GB memory kit was selling for roughly 3-4x the early 2025 price.
I never thought PC components would appreciate in price, what a crazy world we live in!
Interesting Accessories
IP KVM
Unlike the laptops that I use for running always-on processes, the desktop above has a relatively high idle power draw.
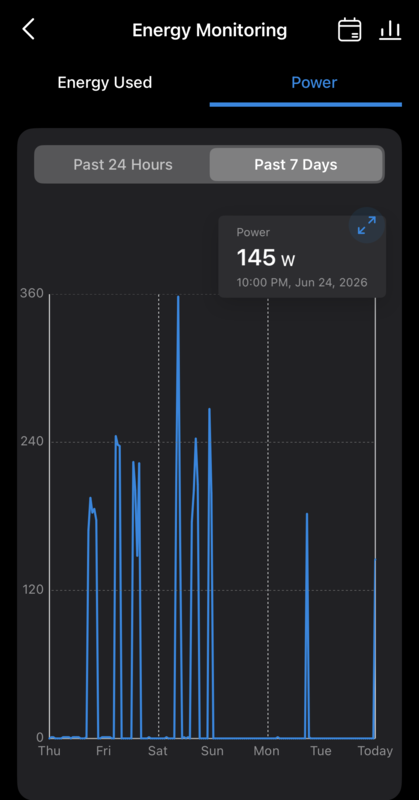
With an idle power draw of ~100 W, it’s like having an always-on incandescent light bulb, which costs ~US$15/month to power if left on 24/7. So instead, I usually just let the machine power on when it has workloads.
In addition, the computer becomes tough to troubleshoot while I’m travelling and don’t have physical access.
This is where getting an IP KVM comes in. Unlike RDP or VNC, it still works before the OS boots, so I can power the PC on or off, force reset it, enter UEFI, recover from a failed boot, and control the keyboard and mouse as if I were in front of the machine.
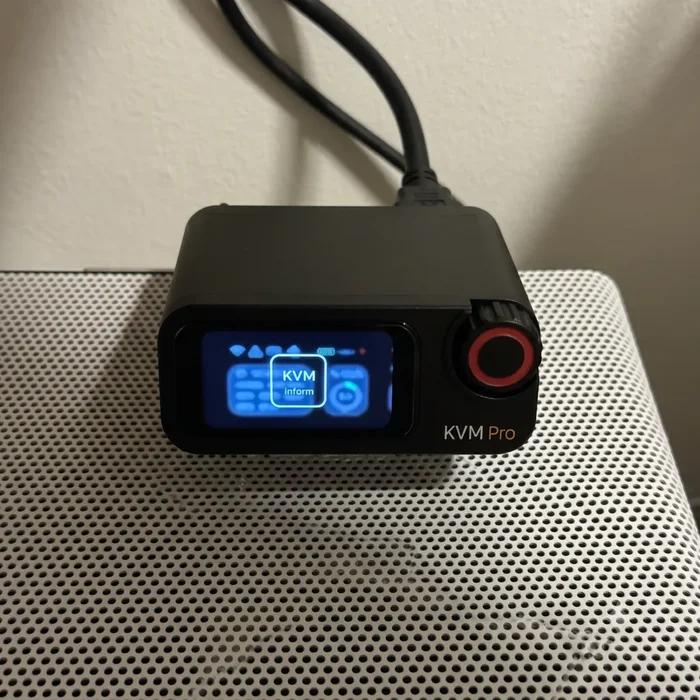
I got Sipeed NanoKVM Pro, but there are tons of similar products on the market. These have gained many features in the past few years, with prices also dropping significantly. One of the best features is the integrated Tailscale support. This really makes accessing my PC remotely as simple as switching on the Tailscale network.
Overall, it is a powerful little gadget. At roughly 100 W idle, leaving the PC on all month would cost about US$15, so being able to power it on only when needed means the KVM can pay for itself over time.
Fingerprint Sensor
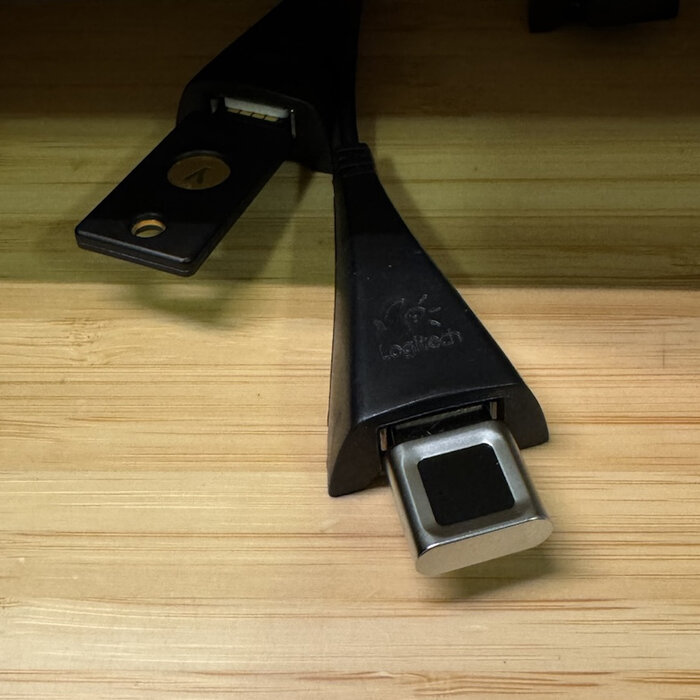
After years of using laptops with built-in biometrics, typing a password every time felt surprisingly annoying. A cheap USB fingerprint sensor fixed most of that for the desktop, even if the integration is not as smooth as on a laptop.
Lessons Learned and Future Plans
In theory, open-source networking firmware that can create a Wi-Fi mesh network from different brands is a great idea. But in practice, it is actually very hard to pull off. While I was able to troubleshoot most of my problems, it was a slow and tedious process. Mind you, AI made troubleshooting a lot easier, but it still requires trial and error. Nonetheless, hats off to the OpenWRT team for creating firmware that can extend the router’s capabilities far beyond what the original manufacturer allows. It also extended the life of the routers massively by adding bug fixes and patching security vulnerabilities.
For me, I needed a networking stack that was more hands-off and also took advantage of the new internet speed. I can imagine updating my access points to Wi-Fi 8 in a few years’ time, or by adding more 10 GbE switches as I add new wired devices.
We are living in a strange and exciting time when hardware gets more expensive over time. My guess is that local AI will become much more affordable by 2030, once the current supply crunch eases. Hardware should be more capable by then, and local models may improve enough that a $1000 setup can run a sufficiently capable model at home.
In a future article, I will go through the software changes that followed, because the hardware refresh was only half the story. For now, the biggest win is that the homelab feels less like something I constantly maintain and more like infrastructure I can build on again.